
Listビューは、データのリストを表示するためのViewです。
目次
Listビューの使い方
List {
子View1
子View2
子View3
・・・
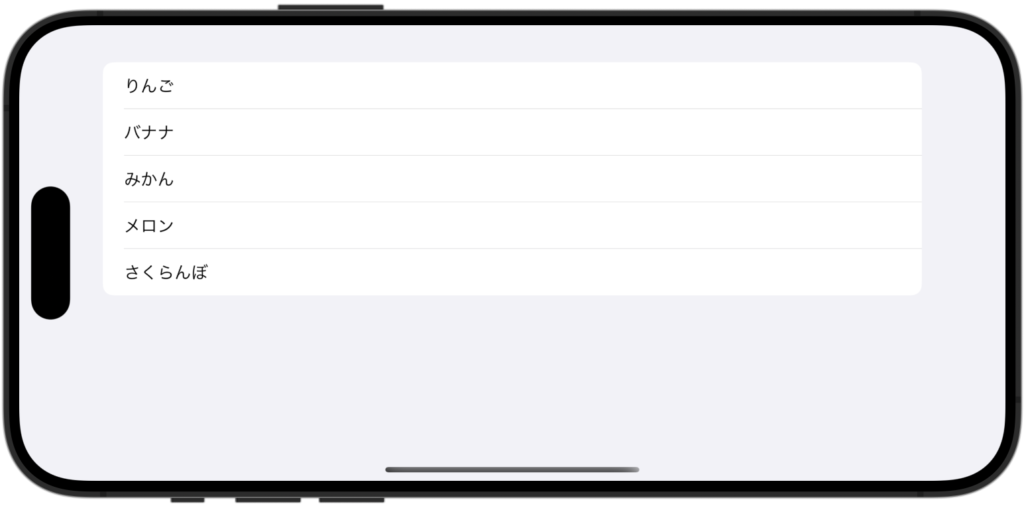
}単純にListの中にViewを列挙していくだけで、一覧を表示することができます。
struct ContentView: View {
    var body: some View {
        List {
            Text("りんご")
            Text("バナナ")
            Text("みかん")
            Text("メロン")
            Text("さくらんぼ")
        }
    }
}
配列データをListに入れて表示する場合
データベースから取得したデータの一覧などをListに並べたい次のようにForEachを使います。
struct ContentView: View {
    // Listに入れるデータ一覧
    let fruits = ["りんご", "オレンジ", "バナナ"]

    var body: some View {
        List {
            ForEach(fruits, id: \.self) { fruit in
                Text(fruit)
            }
        }
    }
}
ForEachを使わずに表現することも可能
List 自体が ForEach を内部で使用しているので、次のように書くこともできます。
struct ContentView: View {
let fruits = ["りんご", "オレンジ", "バナナ"]
var body: some View {
List(fruits, id: \.self) { fruit in
Text(fruit)
}
}
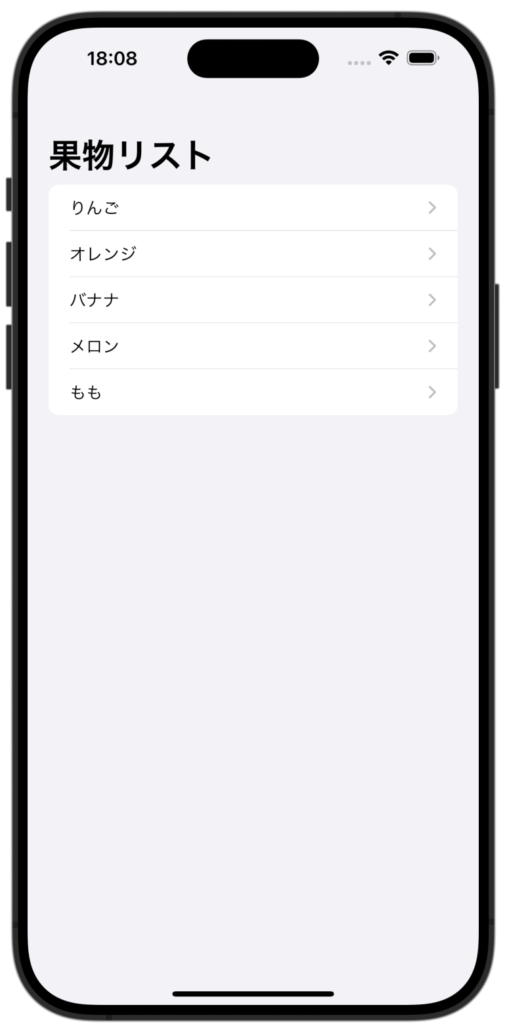
}NavigationLinkをつける
必要に応じて、リスト内の要素をタップしたときのアクションや、詳細画面へのナビゲーションなどを追加できます。
struct ContentView: View {
    let fruits = ["りんご", "オレンジ", "バナナ", "メロン", "もも"]

    var body: some View {
        NavigationStack {
            List(fruits, id: \.self) { fruit in
                NavigationLink(destination: Text("\(fruit)の詳細")) {
                    HStack {
                        Text(fruit)
                        Spacer()
                    }
                }
            }
            .navigationTitle("果物リスト")
        }
    }
}

Listの表示設定
List は、さまざまな表示スタイルをカスタマイズするためのモディファイアを提供しています。以下は、よく使用される List の表示スタイルのモディファイアについての解説です。
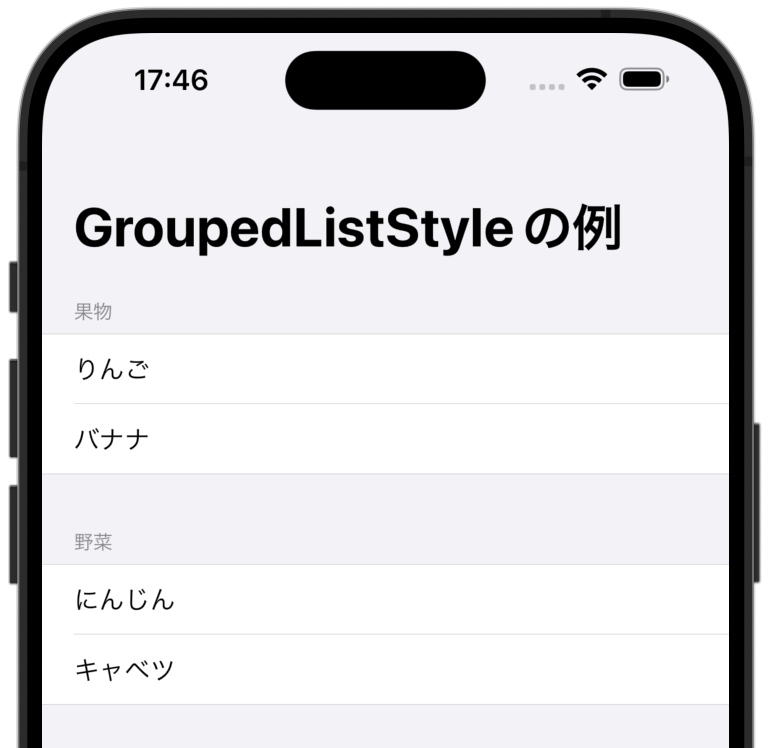
.listStyle(GroupedListStyle()):
GroupedListStyle は、iOSの標準的なグループ化されたリストスタイルを提供します。
セクションごとにグループ分けされ、各セクションにはヘッダーやフッターが含まれます。
struct ContentView: View {
    let items = [
        ("果物", ["りんご", "バナナ"]),
        ("野菜", ["にんじん", "キャベツ"]),
    ]

    var body: some View {
        NavigationStack {
            List {
                ForEach(items, id: \.0) { group, groupItems in
                    Section(header: Text(group)) {
                        ForEach(groupItems, id: \.self) { item in
                            Text(item)
                        }
                    }
                }
            }
            .listStyle(GroupedListStyle())
            .navigationTitle("GroupedListStyleの例")
        }
    }
}
.listStyle(PlainListStyle()):
PlainListStyle は、グループ化されずに単純なリストスタイルを提供します。セクションがなく、全体が一つのリストとして表示されます。
以下の例では、他のリストスタイルとデザインの比較がしやすいようにあえてSectionビューを使っていますが、PlainListStyleを使う場合、本来は使用しません。
struct ContentView: View {
    let items = [
        ("果物", ["りんご", "バナナ"]),
        ("野菜", ["にんじん", "キャベツ"]),
    ]

    var body: some View {
        NavigationStack {
            List {
                ForEach(items, id: \.0) { group, groupItems in
                    Section(header: Text(group)) {
                        ForEach(groupItems, id: \.self) { item in
                            Text(item)
                        }
                    }
                }
            }
            .listStyle(PlainListStyle())
            .navigationTitle("PlainListStyleの例")
        }
    }
}
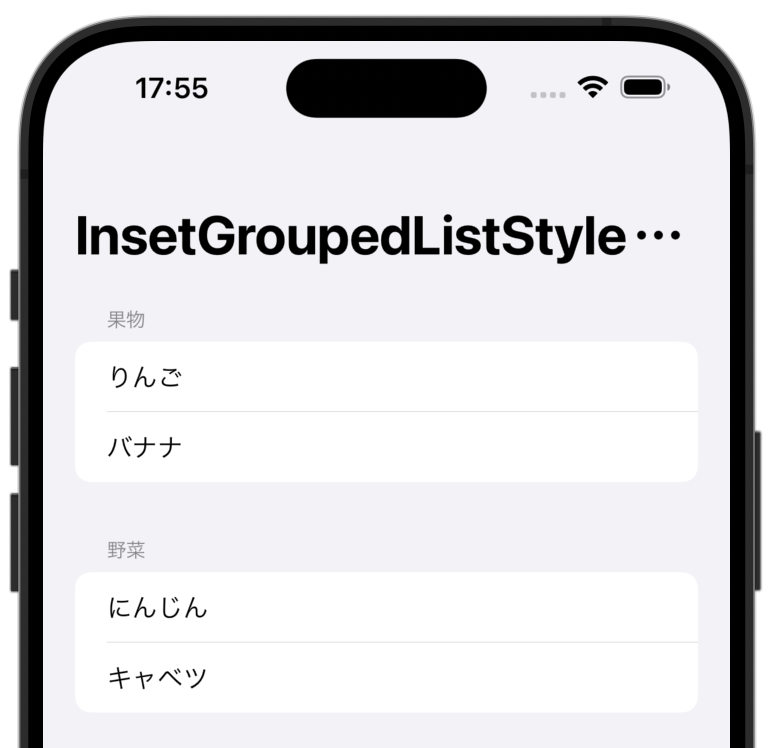
.listStyle(InsetGroupedListStyle()):
InsetGroupedListStyle は、視覚的な観点で言うとGroupedListStyleに余白が追加されたものです。
struct ContentView: View {
    let items = [
        ("果物", ["りんご", "バナナ"]),
        ("野菜", ["にんじん", "キャベツ"]),
    ]

    var body: some View {
        NavigationStack {
            List {
                ForEach(items, id: \.0) { group, groupItems in
                    Section(header: Text(group)) {
                        ForEach(groupItems, id: \.self) { item in
                            Text(item)
                        }
                    }
                }
            }
            .listStyle(InsetGroupedListStyle())
            .navigationTitle("InsetGroupedListStyleの例")
        }
    }
}
関連記事
Seeds


【SwiftUI】Listの背景色を変更する方法 | Seeds
背景色を変更するには scrollContentBackground(_:) を使用します。 .hiddenを設定することで、.backgroundで指定した色が反映されます。 List { // Listの中身 } .scrollC…


Comment