
このページではGodotで作成したゲームをAndroid端末でテストする方法を紹介します。
iOS(iPhoneやiPade)でテストしたい場合は、以下の記事を参考にしてください。

テストを行うための環境設定
1. OpenJDK 17のインストール
OpenJDK 17の公式ページを開いて、ダウンロードします。
ページを開くと一覧が表示されるので、あなたの環境にあったものをダウンロードしてください。 私はMacを使っているので、macOSのものをインストールしています。

ダウンロードしたファイルを開きます。

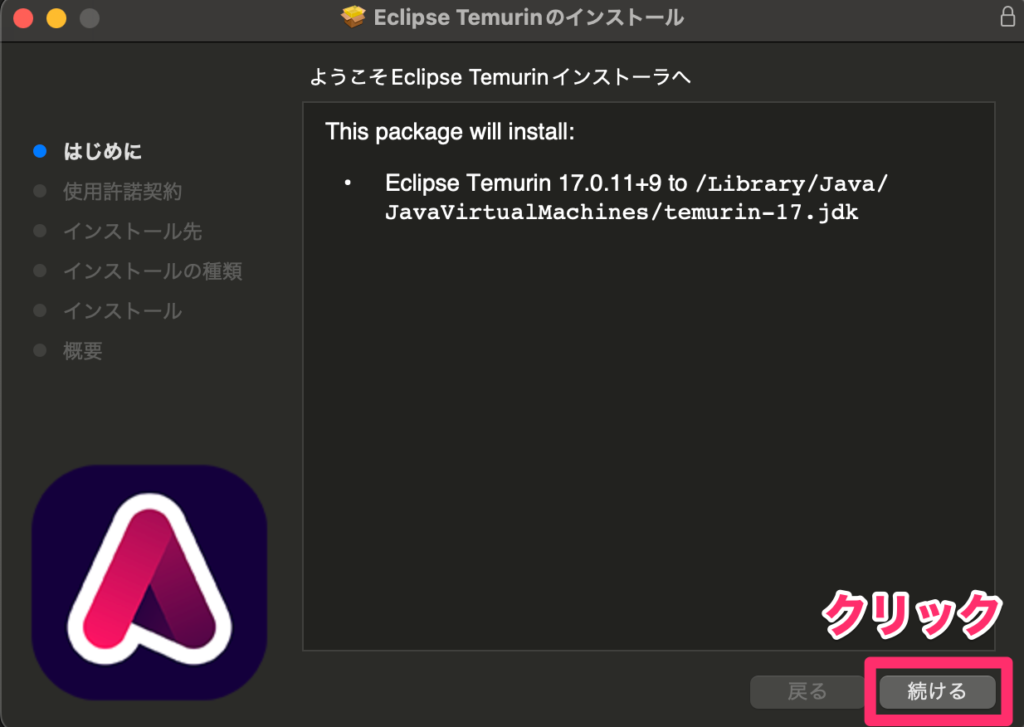
「続ける」をクリック
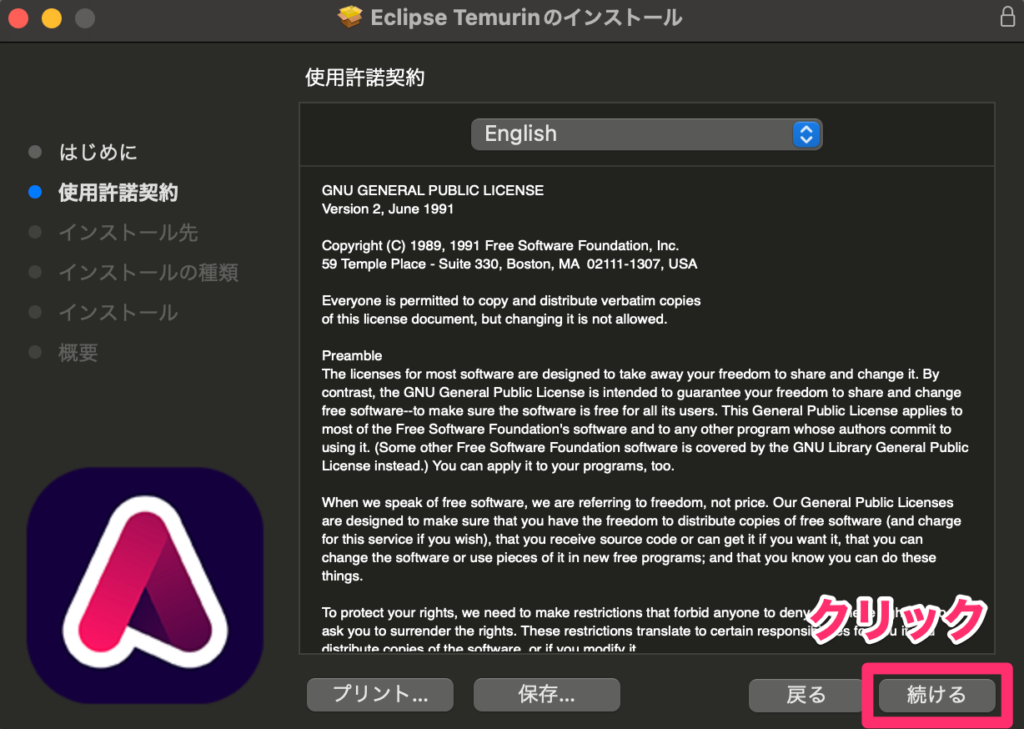
「続ける」をクリック
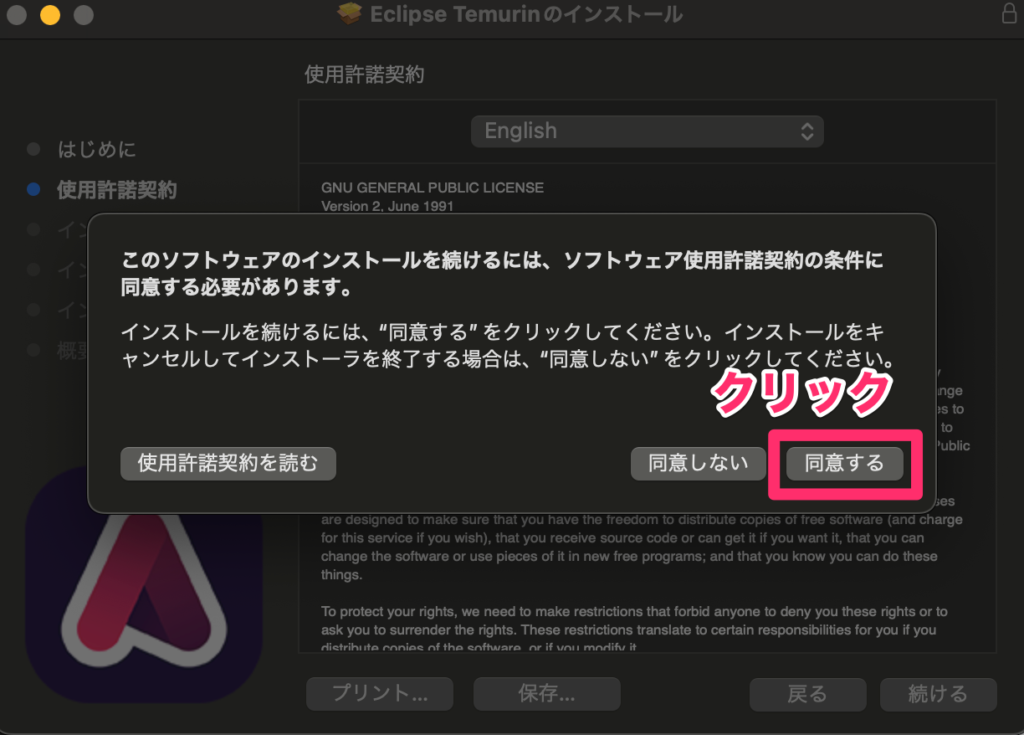
「同意する」をクリック
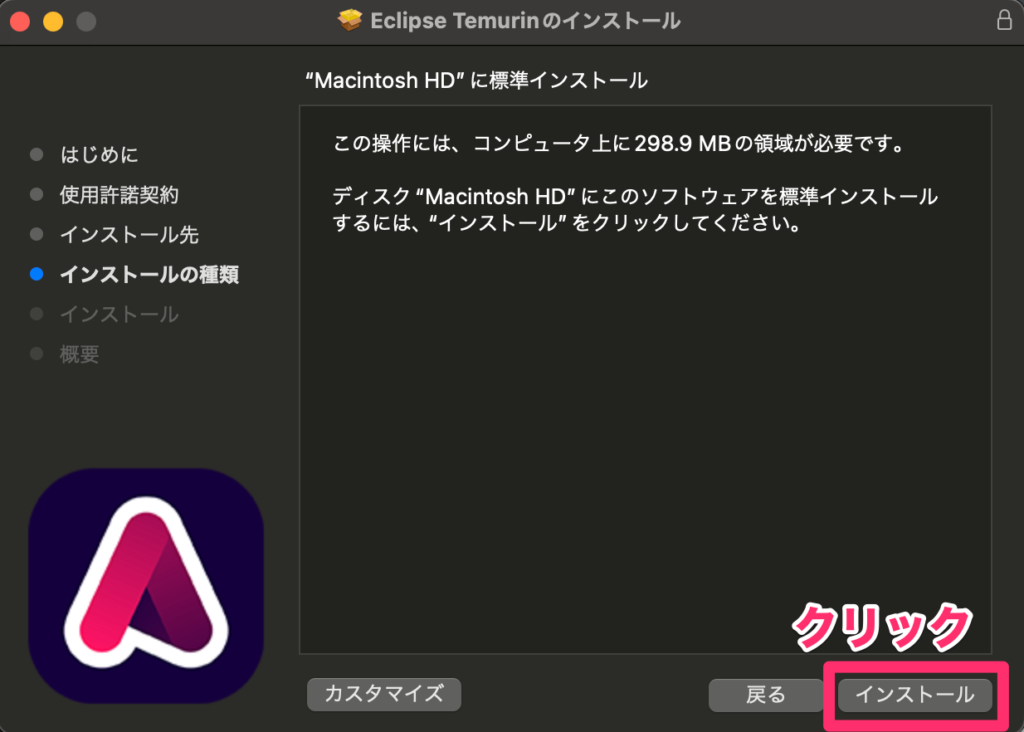
「インストール」をクリック
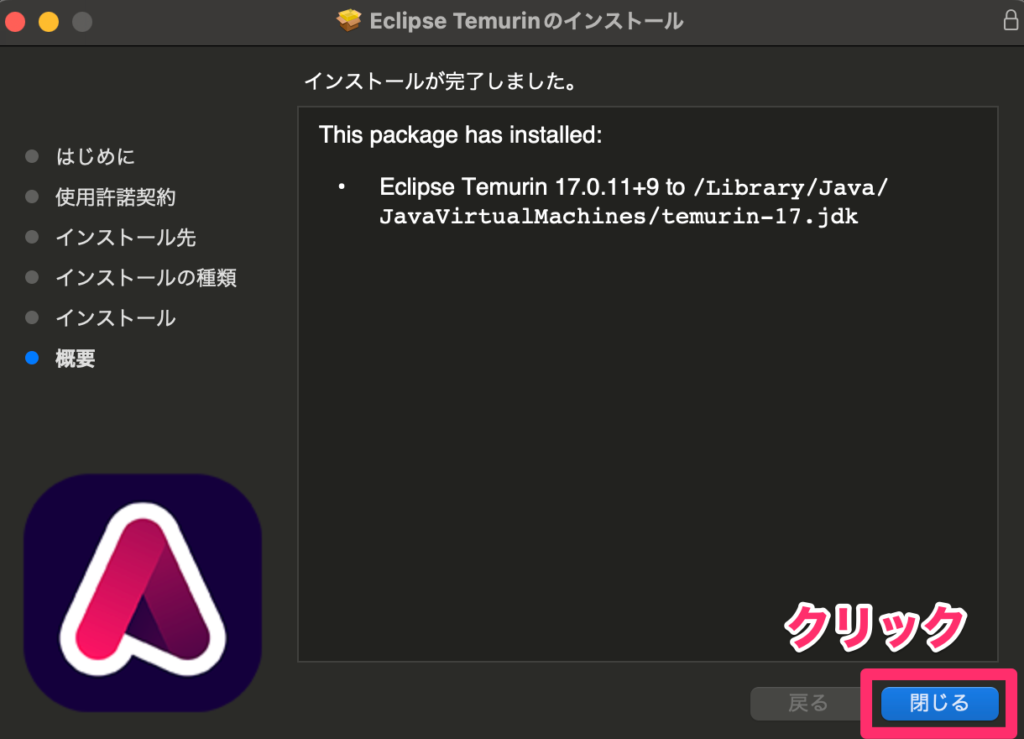
以上で、OpenJDK 17のインストールが完了です。
最後に「閉じる」をクリックします。
2. Android Studioのインストール
Android Studioをインストールします。
私の環境にはすでに登録していたため、手順は割愛します。
基本的にはボタンをポチポチ押していけばダウンロードできるかと思います。
インストールが難しい場合はこちらのページが参考になるかもしれません。
3. Debug Keystoreの作成
以下のコマンドで作成します。
keytool -keyalg RSA -genkeypair -alias androiddebugkey -keypass android -keystore debug.keystore -storepass android -dname "CN=Android Debug,O=Android,C=US" -validity 9999 -deststoretype pkcs12過去にAndroidのアプリを作ったことがある人は作成済みかと思いますので、その場合こちらの手順は不要です。
Godot Engineの設定
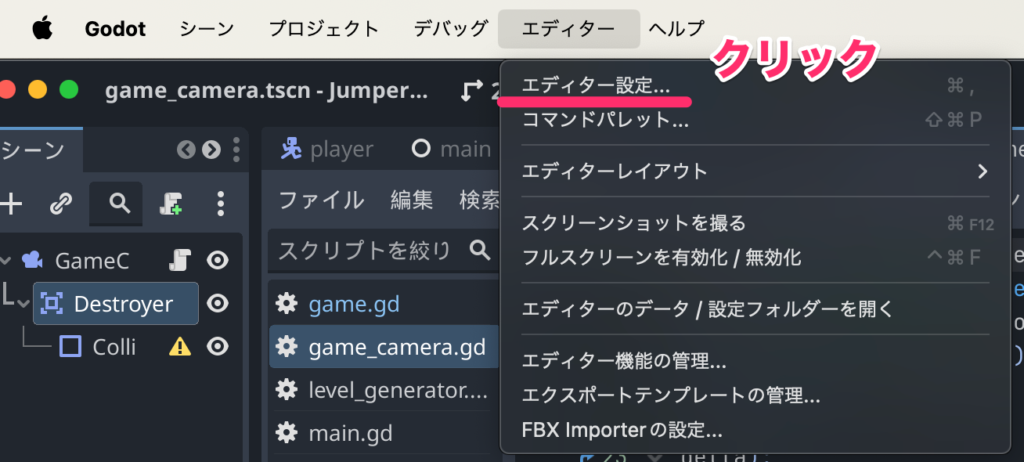
エディター -> エディター設定を開きます。
左のメニューから「Android」をクリックします。
すると、「Java SDK Path」、「Android SDK Path」、「Debug Keystore」が空になっているので、こちらを設定していきます 。
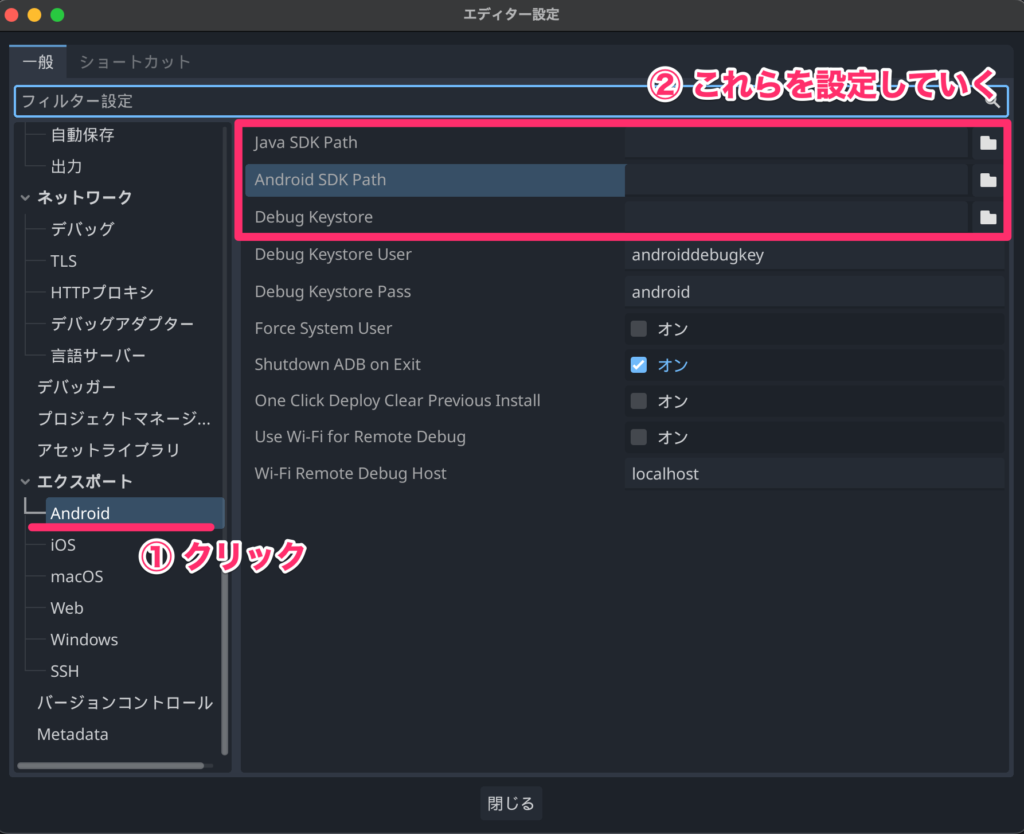
●Java SDK Path の設定
/Library/Java/JavaVirtualMachines/openjdk.jdk/Contents/Home/●Android SDK Path の設定
/Users/あなたのコンピューターのユーザー名/Library/Android/sdk/●Debug Keystore の設定
/Users/あなたのコンピューターのユーザー名/.android/debug.keystore作成したゲームのエクスポート
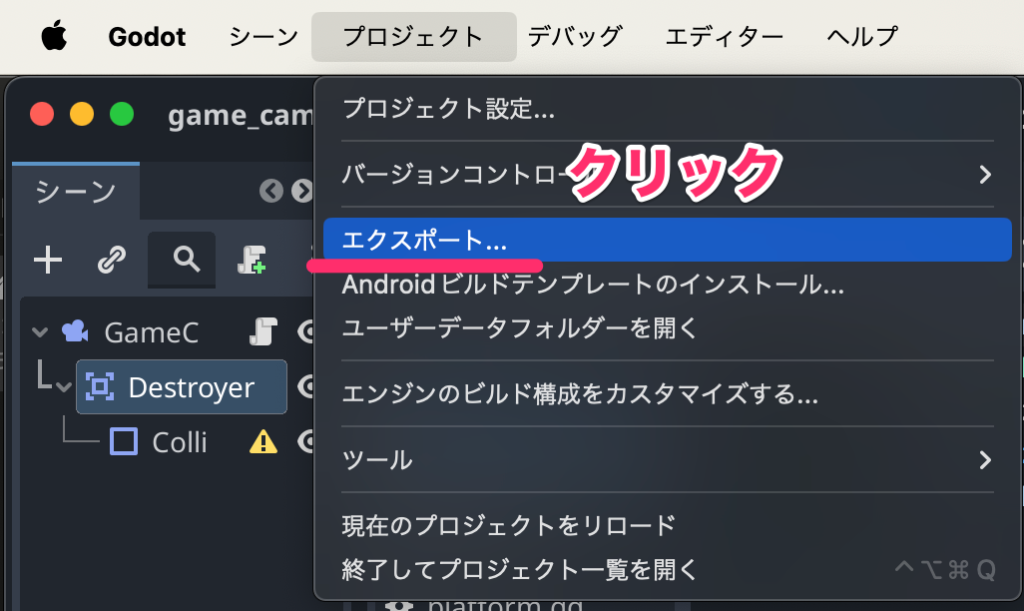
プロジェクト -> エクスポートをクリックします。
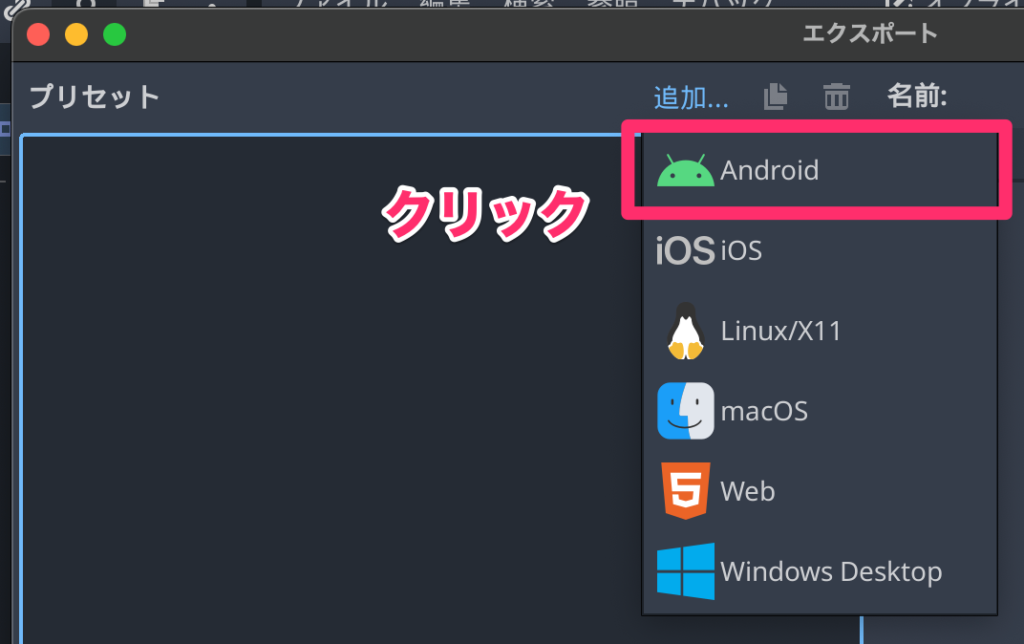
「追加」ボタンをクリックし「Android」を選びます。
エクスポート先のパス、固有名、名前を設定していきます(下の画像の①・②)
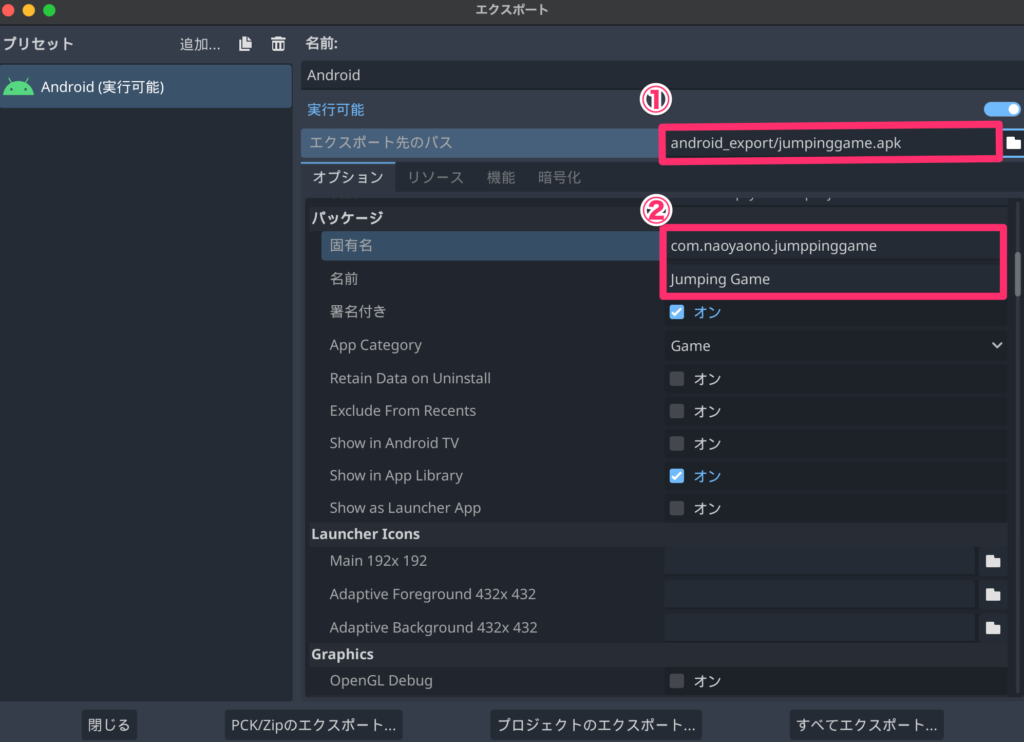
- エクスポート先のパス:ゲームを出力するための場所です。任意の場所を設定してください。
- 固有名:一般的には「com.名前(姓→名の順).ゲーム名」で付けます。
- 名前:ゲーム名を記入してください。
設定できたら、「プロジェクトのエクスポート」をクリックします。
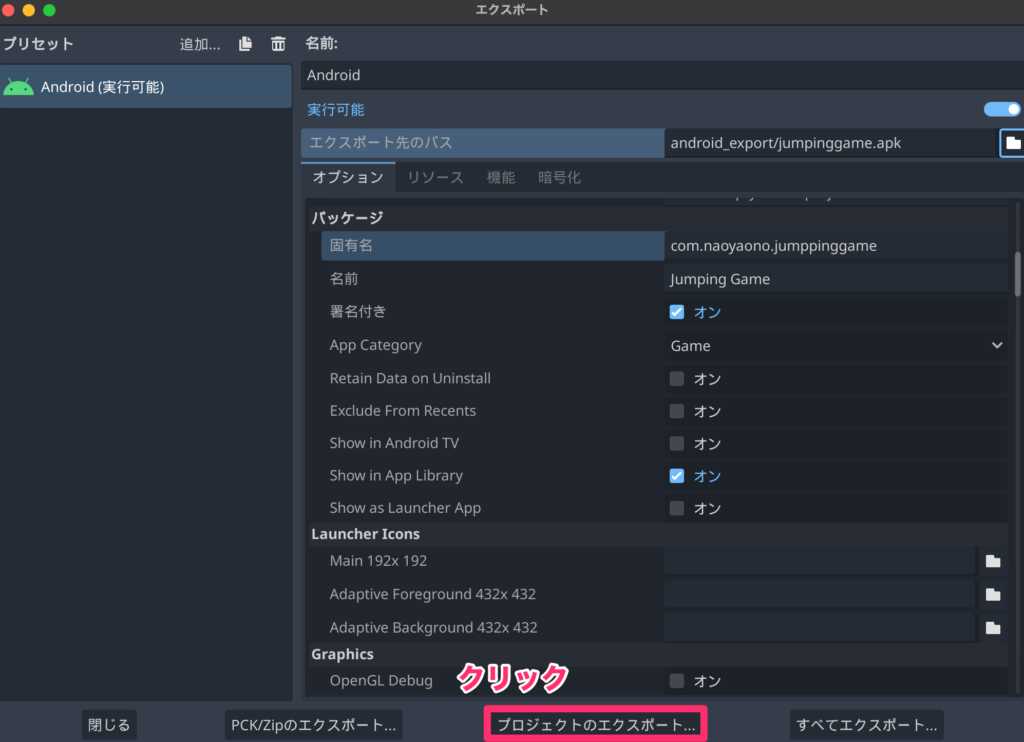
エクスポートが始まるので待ちます。
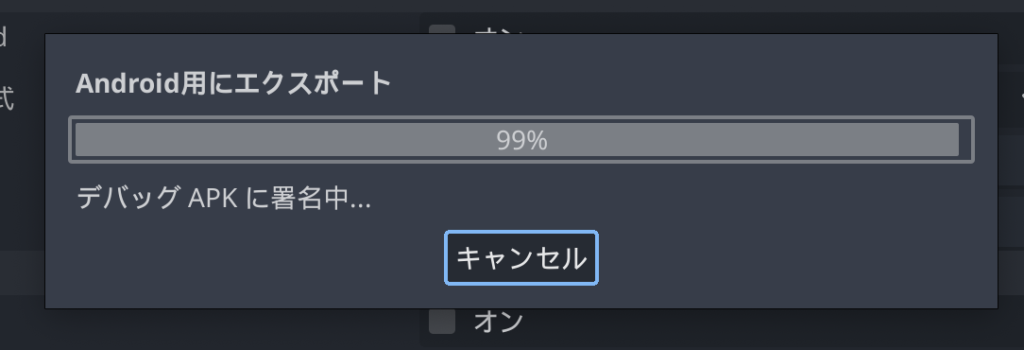
完了すると、ファイルがエクスポートできているのを確認できます。

テストの実施
1. Android端末を開発者モードにしUSBでデバッグできるようにする
機種によって若干操作が異なることがありますが、基本的には以下の記事のように進めていくことで、あなたのAndroid端末を開発者モードに変更できます。
2. Android端末でテストを実行する
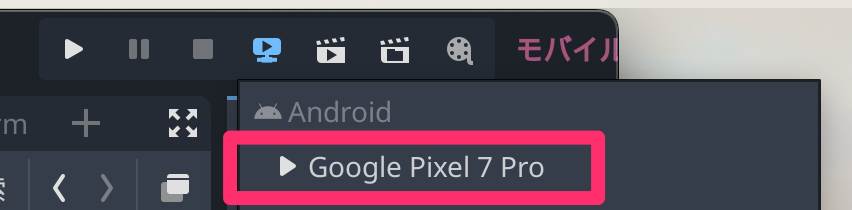
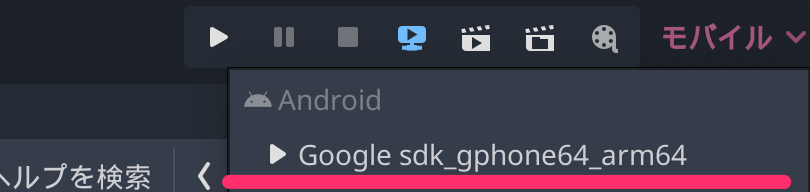
Android端末をPCにUSBに接続した状態で、エディターの右上にあるアイコンをクリックします。

接続されてAndroid端末が表示されるので、そちらをクリックします。私はGoogle Pixel 7 Proを使っているので下の写真のように表示されます。
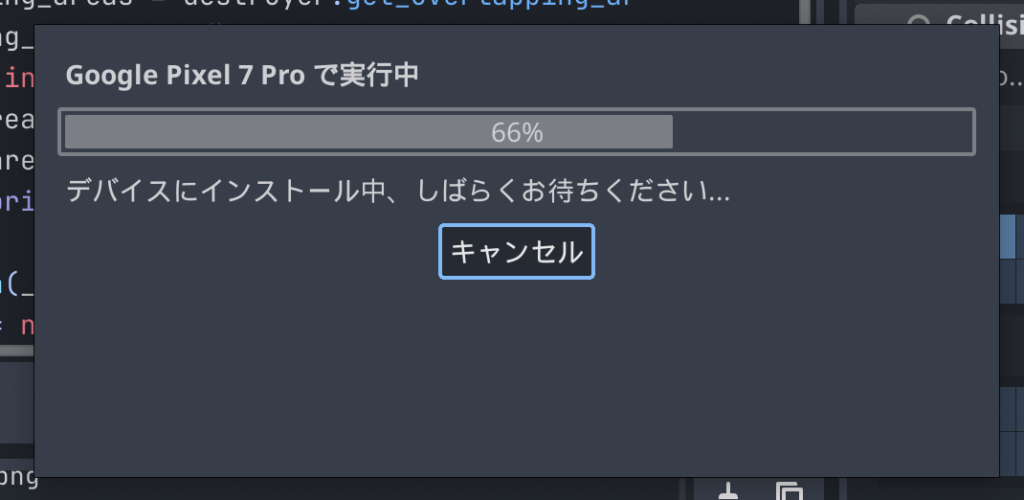
デバイスにゲームがインストールされ、これでテストができるようになります。
おまけ:Androidシミュレータでテストするには?
Androidのテストはシミュレーターでも可能です。
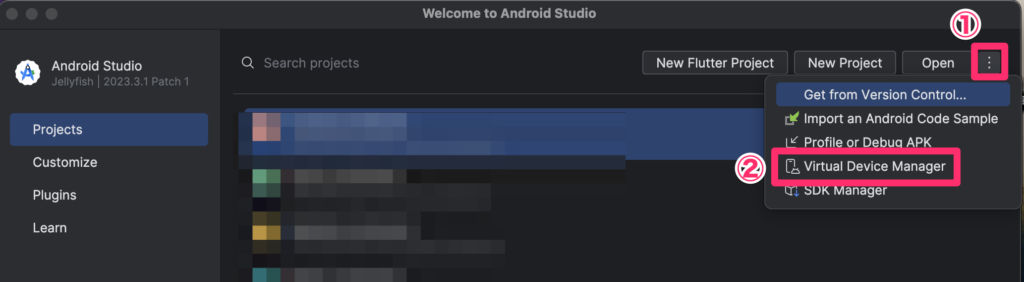
Android Studioを開いて、「︙」をクリックし、「Virtual Device Manager」を選択します。
テストに使うシミュレーターを選んで起動します。
無い場合は「+」から追加できます。

シミュレーターが起動したら、実機テストと同じ手順で、Godot エディターの右上のアイコンをクリックし、起動したシミュレーターを選択してテストを行います。
Comment