
Viewに余白を追加するには、paddingモディファイアを使用します。
目次
基本の書き方
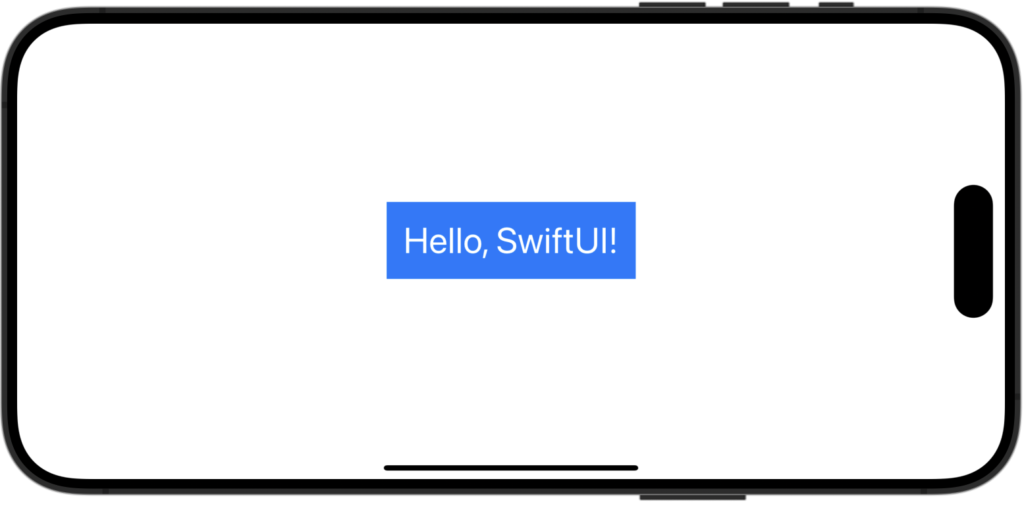
.padding()基本的にはViewに.padding()を付けるだけで余白を追加できます。
struct ContentView: View {
    var body: some View {
        Text("Hello, SwiftUI!")
            .font(.largeTitle)
            .foregroundColor(.white)
            .padding() // デフォルトの余白を追加
            .background(.blue)
    }
}
Paddingモディファイアを使う時の注意点
paddingモディファイアと backgroundモディファイアを一緒に使う場合、backgroundモディファイアは必ず、paddingモディファイアの後につける必要があります。
前につけると余白が追加できません。
余白のサイズを変更するには?
.padding(CGFloat)システムサイズではなく、自分で好きなサイズの余白を取りたい場合は数値を指定してあげるだけです。
struct ContentView: View {
    var body: some View {
        Text("Hello, SwiftUI!")
            .font(.largeTitle)
            .foregroundColor(.white)
            .padding(50) // デフォルトの余白を追加
            .background(.blue)
    }
}
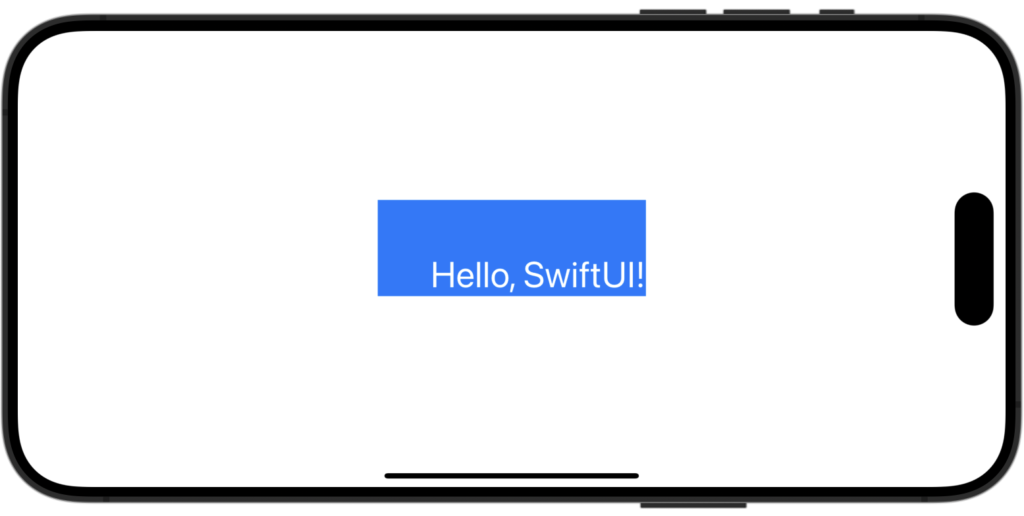
特定の辺にだけ余白を追加するには?
.padding(余白を適用する位置, 余白サイズ)余白を適用する位置は次の中から指定してください。
| .all | すべての辺 |
| .top | 上側のみ |
| .leading | 左側のみ |
| .bottom | 下側のみ |
| .trailing | 右側のみ |
| .vertical | 上下のみ |
| .horizontal | 左右のみ |
struct ContentView: View {
    var body: some View {
        Text("Hello, SwiftUI!")
            .font(.largeTitle)
            .foregroundColor(.white)
            .padding(.top, 50) // 上への余白
            .padding(.leading, 50) // 左への余白
            .background(.blue)
    }
}


Comment